

Deploy Keras neural network to Flask web service | Part 3 - Send and Receive Data with Flask
text
Keras Neural Network Deployment - Send and Receive Data with Flask
In this episode, we'll be creating a web service with Flask that can both send and receive data.
In the last episode, we got acquainted with Flask and built our first web service. We'll be building on what we learned there to create a slightly more sophisticated service.
Web application preview
Let's go ahead and take a look at the final product so we can know what we're working towards, and then we'll get started on seeing how to implement it.
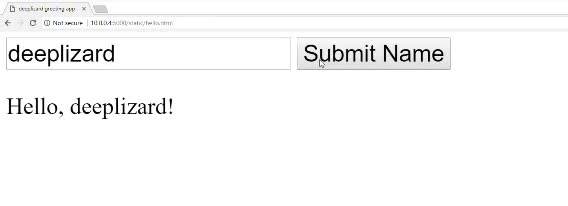
This is a simple web application. This page, hello.html, is written in HTML and Javascript. On this page, we have one text box, and a Submit Name button. In the text box, we enter
our name, and then click the Submit Name button. We then get a message displayed to us that says “hello” to the name we entered in the box.
What's happening behind the scenes here is that our web application gets the data that we enter to the text box, and when we click Submit Name, our web app is sending that data to our
backend Flask web service.
Flask receives this data, the string deeplizard in this case, and then constructs a message, “Hello, deeplizard.” Flask then sends that message back to our web app, and our web app displays the message to us on the page. See the corresponding video for the full demo.
As you can see, we have this back-and-forth dialog going on, this sending and receiving of data, between our web app and our web service. This is exactly what's going to be happening when we build out the service that uses our fine-tuned VGG16 Keras model to predict on images of cats and dogs, so it's good to go ahead and get a feel for how this is happening behind the scenes with this simple example.
With this in mind, we'll be using Flask to do two separate things. We'll be using it to host our web service, and we'll also be using it to host our web app. So let's get into the code and see what exactly is going on.
Web service code
We're going to start by developing our Flask web service.
We first need to get our directory structure set up. As mentioned last time, within our home directory, we have a flask_apps directory. Within flask_apps, we have a
static directory. The static directory is where we can place static files (html files) so that Flask can serve the web page.
This is what I meant earlier when I said we'll also be using Flask to host our web app. We'll come back to this more in a bit.
The flask_apps directory is where we'll place our Python code for the web service. You should now create a new file titled hello_app.py file, and place it within your
flask_apps directory. This is going to hold the code for our Flask web service. Let's open this file up and see what this service is doing.
from flask import request
from flask import jsonify
from flask import Flask

app = Flask(__name__)

@app.route('/hello',methods=['POST'])
def hello():
    message = request.get_json(force=True)
    name = message['name']
    response = {
        'greeting': 'Hello, ' + name + '!'
    }
    return jsonify(response)
On the surface, the format of this file looks pretty similar to our sample app we built last time. Let's go ahead and start stepping through to see what exactly is happening.
First, we need to import the dependencies defined up top. Then we define the variable app in the exact same way as last time to create an instance of the Flask class.
Next, we specify our app decorator , just like before, but this time, we're calling our endpoint hello. We're
also setting the methods parameter equal to a list [] that just contains the string 'POST'.
The methods parameter specifies what kind of HTTP requests are allowed for this endpoint. With a POST request, the expectation is that the client application will send data to the
web server along with the request. Remember, we said that the web app was going to be sending the name that was supplied in the text box to the Flask web service, so the name entered there would be the data
contained in the HTTP POST request sent from our web app.
Next, we define our function that instructs Flask on what to do when a POST request is received by this endpoint. We call this function hello.
Within the hello function, we first define a variable called message. This is the message, i.e. the data, that is received from the client. We set message to
request.getJSON.
request, which we imported up top, gives us the ability to access the data that is sent to this hello endpoint.
We then call get_json on the request, which gives us the message from the client in JSON. JSON, which stands for
Javascript object notation, is a standard way to organize data into key value pairs. The force=true parameter tells flask to always try to parse the JSON from the request even if its unsure
of the datatype.
We then define a variable called name. This endpoint is expecting the posted data to be in JSON, and it expects that JSON to contain at least one key-value pair for which the key is called
name.
We define the name variable to be the value associated with the name key in the JSON data.
Next, we define a variable called response. This is going to be the response that Flask sends back to the web app. We set response to a dictionary that contains the key
greeting, and the value Hello + name.
We then pass the response to the jsonify function that converts our Python dictionary into JSON. Our hello function then returns this JSON response to the web application.
We've walked through how this Flask web service handles POST request from client applications. Let's now make sure that we can start our Flask app by heading over to the terminal.
Starting the Flask app
From the flask_apps directory, we run the command export FLASK APP = hello_app.py to point to our new web service. Recall, if you're running Flask from a Windows command prompt
or Powershell, check the
previous episode for the correct corresponding command. Then we run the command flask run --host=0.0.0.0.
The output from this command gives us indication that our app is up and running.
We now have our backend fully built and running, but we've not yet showed the code for our front end web application that calls this backend.
We're going to be showing how to build the web app in HTML and Javascript to call our Flask service in the next episode. Once you've got your web service up and running, let me know in the comments! See ya in the next one.
quiz
 DEEPLIZARD
Message
DEEPLIZARD
Message
resources
updates
Committed by on