

Deploy Keras neural network to Flask web service | Part 2 - Build your first Flask app
text
Build your first Flask web service
In this episode, we're going to quickly discuss Flask, see how to get it installed, and make our first simple web service.

We briefly talked last time about how we'd be working with Flask over the next several episodes, and we referred to what we'd be building as a “web service.”
Let's elaborate on Flask more now so we can get a little more comfortable and understand its role in our upcoming tasks.
Introduction to Flask
Technically, Flask is considered a microframework for Python. A microframework is just a term that describes a very minimal web application framework. A web application framework is just software that supports the development of web apps, including web services.
As previously discussed, we'll be using Flask to host a web service. Our web service will be handling HTTP requests that come in asking for predictions of images of cats and dogs from our fine-tuned VGG16 network.
Before we start creating a web service, we first need to get Flask onto our machines.
Installing Flask
To install Flask, you'll first need an environment where Python is installed.
Installation is pretty straightforward. If you're using a Linux environment, then assuming you already have Python installed, from the terminal you can simply run the following command.
sudo pip install Flask
If you're using a Windows environment, then from a command line window launched with admin privileges, you can run the following command.
pip install Flask
If you're using Anaconda, then from the terminal, you can run the following command.
conda install -c anaconda flask
Creating a sample Flask app
Now that we have Flask installed, let's test it out to make sure it works.
To do this, we're going to write a simple web service that gives the user the message “Flask is running!” when we browse to the web service.
First, we need to create a Python file for where we'll write our code.
Create a file called sample_app.py, and place it inside of a new directory called flask_apps.
Now, let's open this file to begin writing the code.
First, we import the Flask class.
from flask import Flask
Next, we define a variable called app.
app = Flask(__name__)
This line is creating an instance of the Flask class, and the __name__ argument is the name of the application's module. The Flask documentation tells us to use this
name like this if we're simply using a single module like we are here.
Next, we have an app decorator that tells Flask what URL a user has to browse to in order for the function underneath it to be called. The argument we pass to the route() function is also called an
endpoint.
@app.route('/sample')
So, when someone browses to this sample endpoint, only then will they get what we define next.
Now, to the function.
def running():
    return 'Flask is running!'
I've named this function running(), and all it does is return the string “Flask is running!” when the user browses to the sample endpoint.
That's it for what we'll include in our program! This is our web service.
Starting the Flask app
Now, we need to tell Flask which program we want to run, and then we need to start Flask. Be sure to first cd into the directory for which your app is located before you run the following commands.
If you're running this from a Linux machine, then from the terminal, type the following command.
export FLASK_APP=sample_app.py
If you're running this from a Windows machine, then from the command prompt launched with admin privileges, run the following command.
C:\path\to\app set FLASK_APP=sample_app.py
If you'd like to run this from Powershell, then instead, run the following command.
$env:FLASK_APP="sample_app.py"
Next, both for Linux and Windows users, run the following command.
flask run --host=0.0.0.0
This command starts Flask, and the host parameter specified in this way makes the web service visible and publicly available to all computers on your network. Otherwise, if you don't
specify the host parameter like this, then you can only access the service from your local machine. Just make sure you trust the users on your network before you specify the parameter in this
way.
After running this command, you should receive indication in your terminal that Flask is running on port 5000, which is the default port for Flask, so let's see what happens when we browse
to our service.
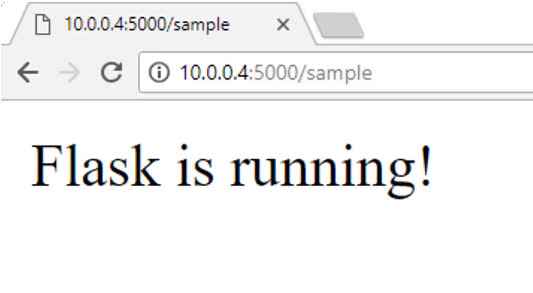
If you're going to be browsing from the same machine where Flask is running, then you don't have to worry about what IP address is assigned to your machine, and you can simply browse to http://localhost:5000/sample.
Remember, sample is the name of the endpoint we created in our service.
If you're browsing from a remote machine, then you should the IP address where Flask is running for localhost in the address.
When we browse to the page, we should receive a message on the page that says “Flask is running!”
From the Flask terminal, we can also see some logging information for the request that came through, including the IP address that browsed to the web service, the date and time for which the request occurred, what type of request it was, which endpoint was accessed, and the HTTP response code.

Make sure you're up and running with Flask and that you can do everything we demoed in this episode. If you happen to get any errors when you attempt to start Flask, then be sure to first check the Flask documentation to see if your error can be resolved by the steps mentioned there.
In the next episode, we'll create another simple web service with Flask, but this time, we'll actually be passing data to the service, and having it return data back to us.
To pass data to Flask, we'll also be building a front end application in HTML and Javascript. This will prepare us for the work we'll need to do to create the service and the front end application we'll create to handle our predictions from VGG16 in a later episode.
Let me know in the comments if you're all set and ready to go, and I'll see ya in the next one!
quiz
 DEEPLIZARD
Message
DEEPLIZARD
Message
resources
updates
Committed by on