Deploy Keras neural network to Flask web service | Part 6 - Build web app to send images to VGG16
text
Keras neural network deployment - Build web app
In this episode, we'll be building the front end web application to send images to our Keras model being hosted by Flask.
In the last episode, we got our predict endpoint setup on the Flask side to receive images of cats and dogs and respond with predictions from our fine-tuned VGG16 model.
In this episode, we'll be developing the front end of our application that will allow users to browse to a web page, predict.html, select an image, and have the predictions for that
image from VGG16 displayed to them.

Web application code
Let's go inside our flask_apps\static directory. Remember, this is the static directory is where we place our html files. Within static, create a new file called
predict.html. This is where we're going to place the Javascript and HTML for our web application.
We've already gone through all the details about HTML and Javascript in an earlier episode where we built our first web application, so we'll only focus on what's new here.
The head of the page
The basic structure of this page is pretty much the same as it was in that previous episode. The head of the page is almost exactly the same as well, with the exception of the title.
<!DOCTYPE html>
<html>
<head>
    <title>deeplizard predict image app</title>
    <style>
        * {
            font-size:30px;
        }
    </style>
</head>
The body of the page
Within our body, we first have several elements on the page.
<body>
    <input id="image-selector" type="file">
    <button id="predict-button">Predict</button>
    <p style="font-weight:bold">Predictions</p>
    <p>Dog: <span id="dog-prediction"></span></p>
    <p>Cat: <span id="cat-prediction"></span></p>
    <img id="selected-image" src=""/>
    ...
    ...
We first have an input element of type file, which is the file selector for which users can browse and select the image they want to get a prediction for.
We have a predict button for the user to click when they're ready to get their prediction.
We have a paragraph p with the word Predictions, which is just the place on the page where the predictions will be displayed.
Underneath that paragraph we have two more paragraphs, one for Dog, and one for Cat, and this is where the individual probability values for the dog and cat predictions will be
displayed on the page.
Lastly, we have an img tag for the image that is selected using the file selector that we created at the top of the page. The src attribute specifies the URL of the image. Initially,
the src attribute is an empty string because no image is selected until the user browses to it from the file selector.
That's it for the elements on the page.
<script src="https://code.jquery.com/jquery-3.3.1.min.js"></script>
Next we import jQuery in the first script tag.
We have all of our Javascript embedded in the second script tag.
<script>
    let base64Image;
    $("#image-selector").change(function() {
        let reader = new FileReader();
        reader.onload = function(e) {
            let dataURL = reader.result;
            $('#selected-image').attr("src", dataURL);
            base64Image = dataURL.replace("data:image/png;base64,","");
            console.log(base64Image);
        }
        reader.readAsDataURL($("#image-selector")[0].files[0]);
        $("#dog-prediction").text("");
        $("#cat-prediction").text("");
    });

    $("#predict-button").click(function(){
        let message = {
            image: base64Image
        }
        console.log(message);
        $.post("http://10.0.0.4:5000/predict", JSON.stringify(message), function(response){
            $("#dog-prediction").text(response.prediction.dog.toFixed(6));
            $("#cat-prediction").text(response.prediction.cat.toFixed(6));
            console.log(response);
        });
    });
</script>
Here, we first instantiate the base64Image variable. We then grab our image-selector, which is the element the user interacts with to browse to an image file, and we call the jQuery
function change() on it. So, when a change event happens on this image-selector, like, when a user selects a new file, then we specify how to handle that change using
the callback function passed to change().
Within the callback function, we first initialize the reader object as an instance of the FileReader class. This object will allow our web application to read the contents of the
file the user selects.
We then set the onload handler for reader. onload is a handler for the load event, which is triggered when the FileReader successfully reads
the contents of a file.
So, when our reader object reads the contents of our image file, we first initialize this dataURL variable to be equal to reader.result. reader.result contains the image data as a URL that represents the file's data as a base64 encoded string.
We then set the source attribute of the selected image equal to the value of dataURL. This causes the image to be displayed on the page.
Then, we set base64Image to be equal to the value of dataURL without the portion of the URL that includes data:image/png;base64. This is the metadata about the image.
When we strip this out, we're left with just the base64 encoded contents of the image file, and that's what we're assigning to the base64Image variable.
In this example, we're working only with PNG images, so if you're working with other image file types, you'll need to keep that in mind so you can make the necessary adjustments to where I've specified png here.
Lastly, we log the base64Image contents to the console.
Alright, that's it for what happens after the reader reads the contents of our selected image file, but we're still nested within our callback function for the change event that occurs once a user selects an image from the image-selector.
Within this callback, we have a couple things left to do.
First, we need to actually load the selected image, and we do that by calling readAsDataURL on reader, which reads the contents of the selected file.
When a change event happens on the image-selector, we read the image, and when that happens, the load event occurs, which triggers the onload handler we
just defined.
Next, we need to get rid of any previous text that was being displayed for cat and dog predictions. So for example, if we selected one image, and got a prediction, and then we wanted to select another image, we want those previous predictions to be cleared from the page.
That's everything that happens once an image is selected. Next we need to specify what happens once the Predict button is clicked.
When a click event occurs on our Predict button, we first define the variable called message to be a Javascript object with a key called image, who's
value is the base64 image.
Next, we log a message to the console.
Then we make a post request to our predict endpoint with our message, converted to JSON, and we specify what to do with the endpoint's response within a callback function.
Recall from when we built the predict endpoint that it responds with JSON that contains a prediction key. The prediction key's value contains a dog prediction and a cat prediction.
Once we get a response, we set the dog prediction text on our web page equal to the value of the dog prediction returned from the endpoint, and we do the same thing for cat. We also call this toFixed() function which just rounds off the predictions to six decimal places, and finally, we log this response to the Javascript console in the browser.
Testing the web app
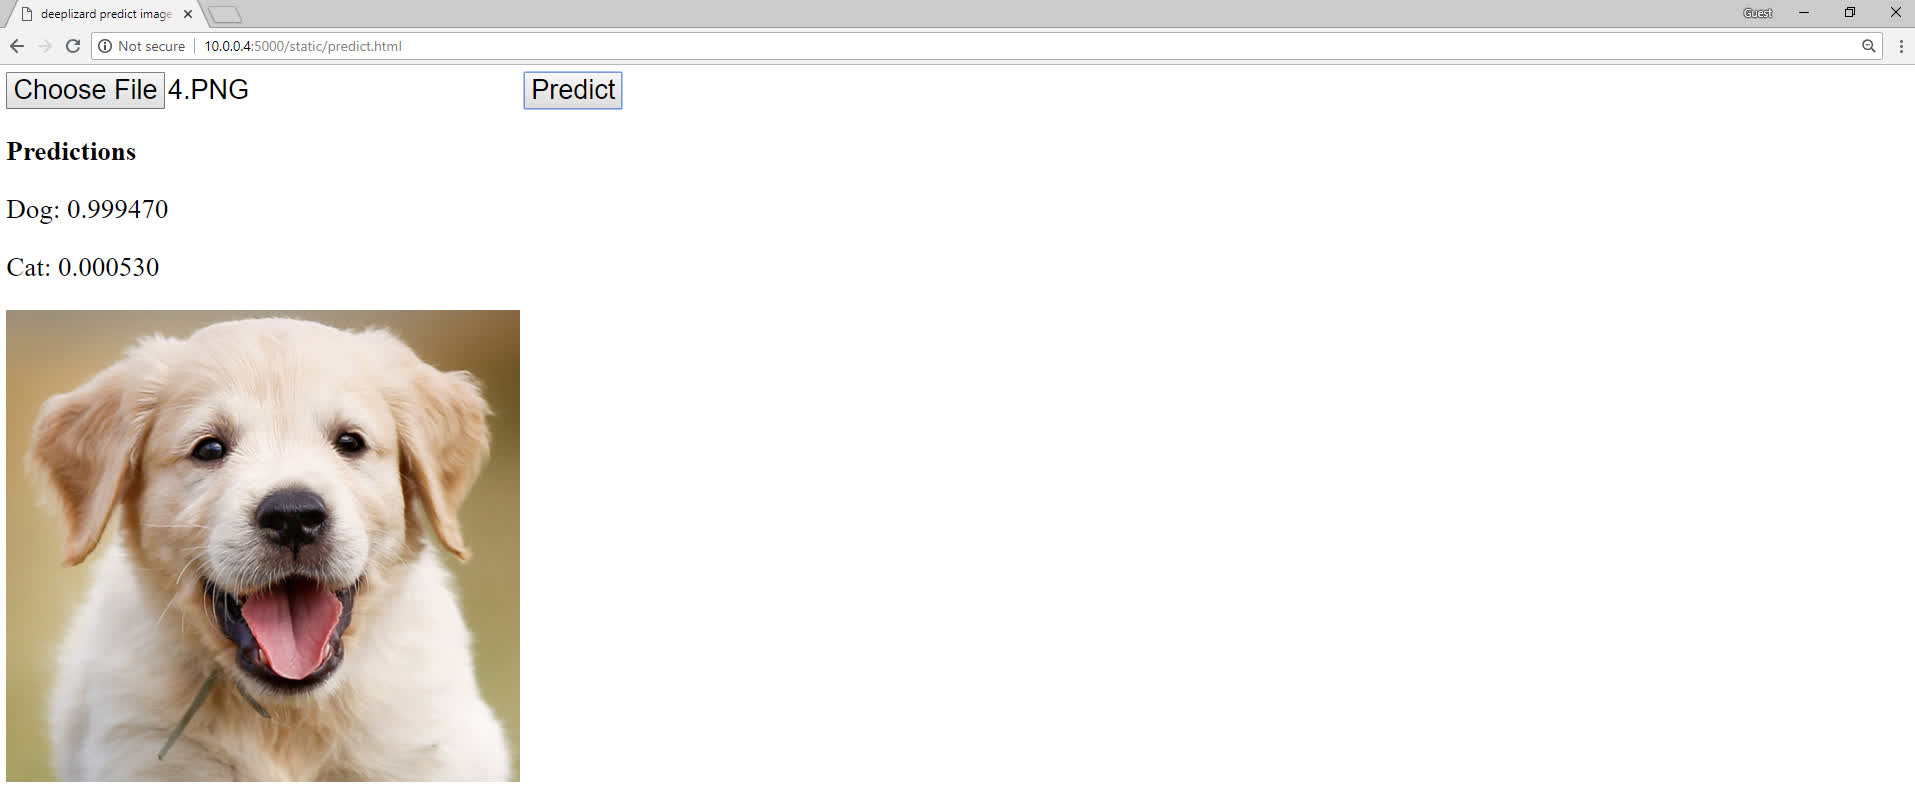
Our Flask app should already be up and running from last time. Check your terminal to be sure it is still running, and if you need to restart it, review how in the previous episode. Now let's go interact with our web page.
Browse to the http://10.0.0.4:5000/static/predict.html, but be sure to substitute your own IP address for the 10.0.0.4 address.
Go ahead and select an image of a dog. Click predict, and you should get an accurate prediction for the image. Browse to a few other cat or dog images, and check to ensure you're getting accurate predictions for those as well.

If you've gotten this far, great job! You've now gained major flexibility in terms of working and interacting with your neural networks. Let me know where you stand in the comments.
We'll be continuing to work with this application moving forward to make some enhancements and check out other functionality that we can gain by having our neural network hosted in a web service, so stay tuned, and I'll see ya in the next one!
quiz
resources
updates
Committed by on


 DEEPLIZARD
Message