

PyTorch Datasets and DataLoaders - Training Set Exploration for Deep Learning and AI
text
PyTorch Datasets and DataLoaders for deep Learning
Welcome back to this series on neural network programming with PyTorch. In this post, we see how to work with the Dataset and DataLoader PyTorch classes.

Our goal in this post is to get comfortable using the dataset and data loader objects as well as to get a feel for our training set. Without further ado, let's get started.
From a high-level perspective, we are still in the preparing data stage of our deep learning project.
- Prepare the data
- Build the model
- Train the model
- Analyze the model's results
In this post, we are going to see how we can work with the dataset and the data loader objects that we created in the previous post. Remember from the
previous post, that we have two PyTorch objects, a Dataset and a DataLoader.
-
train_set -
train_loader
We are now ready to see how to work with these objects, so let's get to it.
PyTorch Dataset: Working with the training set
Let's begin by looking at some operations we can perform to better understand our data.
Exploring the data
To see how many images are in our training set, we can check the length of the dataset using the Python len() function:
> len(train_set)
60000
This 60000 number makes sense based on what we learned in the post on the
Fashion-MNIST dataset. Suppose we want to see the labels for each image. This can be done like so:
> train_set.targets
tensor([9, 0, 0, ..., 3, 0, 5])
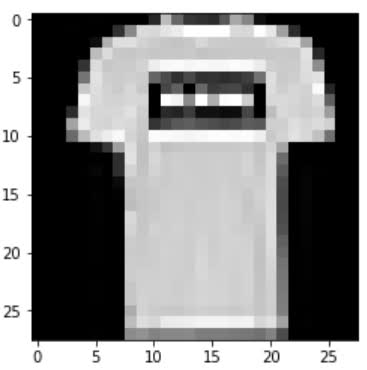
The first image is a 9 and the next two are zeros. Remember from
posts past, these values encode the actual class name or label. The 9 for example is an
ankle boot while the 0 is a
t-shirt.
If we want to see how many of each label exists in the dataset, we can use the PyTorch bincount() function like so:
> train_set.targets.bincount()
tensor([6000, 6000, 6000, 6000, 6000, 6000, 6000, 6000, 6000, 6000])
Class imbalance: Balanced and unbalanced datasets
This shows us that the Fashion-MNIST dataset is uniform with respect to the number of samples in each class. This means we have 6000 samples for each class. As a result, this dataset is said
to be balanced. If the classes had a varying number of samples, we would call the set an unbalanced dataset.
Class imbalance is a common problem, but in our case, we have just seen that the Fashion-MNIST dataset is indeed balanced, so we need not worry about that for our project.
To read more about the ways to mitigate unbalanced datasets in deep learning, see this paper: A systematic study of the class imbalance problem in convolutional neural networks.
Accessing data in the training set
To access an individual element from the training set, we first pass the train_set object to Python's
iter() built-in function, which returns an object representing a stream of data.
With the stream of data, we can use Python built-in next() function to get the next data element in the stream of data. From this we are expecting to get a single sample, so we'll name
the result accordingly:
> sample = next(iter(train_set))
> len(sample)
2
After passing the sample to the len() function, we can see that the sample contains two items, and this is because the dataset contains image-label pairs. Each sample we retrieve from the training
set contains the image data as a tensor and the corresponding label as a tensor.
Since the sample is a
sequence type, we can use
sequence unpacking to assigned the image and the label. We will now check the type of the image and the label and see they are both torch.Tensor objects:
> image, label = sample

> type(image)
torch.Tensor

> type(label)
int
We'll check the shape to see that the image is a 1 x 28 x 28 tensor while the label is a scalar valued tensor:
> image.shape
torch.Size([1, 28, 28])

> torch.tensor(label).shape
torch.Size([])
We'll also call the squeeze() function on the image to see how we can remove the dimension of size 1. This is
review of course.
> image.squeeze().shape
torch.Size([28, 28])
Again, based on our previous discussion of the
Fashion-MNIST dataset, we do expect to see the 28 x 28 shape for our image. The reason we see a 1 on the first dimension of the tensor is because the number of channels needs
to be represented. Opposed to RGB images that have 3 color channels, grayscale images have a single color channel. This is why we have a 1 x 28 x 28 tensor. We have
1 color channel that has a size of 28 x 28.
Let's plot the image now, and we'll see why we squeezed the tensor in the first place. We first squeeze the tensor and then pass it to the imshow() function.
> plt.imshow(image.squeeze(), cmap="gray")
> torch.tensor(label)
tensor(9)
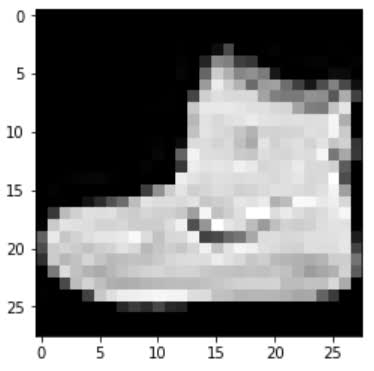
We get back an ankle-boot and the label of 9. We know that the label 9 represents an ankle boot because it was specified in the paper that we looked at in the
previous post
.
Alright. Let's see how to work with the data loader now.
PyTorch DataLoader: Working with batches of data
We'll start by creating a new data loader with a smaller batch size of 10 so it's easy to demonstrate what's going on:
> display_loader = torch.utils.data.DataLoader(
    train_set, batch_size=10
)
We get a batch from the loader in the same way that we saw with the training set. We use the iter() and next() functions.
There is one thing to notice when working with the data loader. If shuffle=True, then the batch will be different each time a call to next occurs. With shuffle=True, the first samples
in the training set will be returned on the first call to next. The
shuffle functionality is turned off by default.
# note that each batch will be different when shuffle=True
> batch = next(iter(display_loader))
> print('len:', len(batch))
len: 2
Checking the length of the returned batch, we get 2 just like we did with the training set. Let's unpack the batch and take a look at the two tensors and their shapes:
> images, labels = batch

> print('types:', type(images), type(labels))
> print('shapes:', images.shape, labels.shape)
types: <class 'torch.Tensor'> <class 'torch.Tensor'>
shapes: torch.Size([10, 1, 28, 28]) torch.Size([10])
Since batch_size=10, we know we are dealing with a batch of 10 images and 10 corresponding labels. This is why we went plural on the variable names.
The types are tensors like we'd expect. However, the shapes are different from what we saw with the single sample. Instead of having a single scalar value as our label, we have a rank-1 tensor with 10 values. The size of each dimension in the tensor that contains the image data is defined by each of the following values:
(batch size, number of color channels, image height, image width)
The batch size of 10, is why we now have a 10 in the leading dimension of the tensor, one index for each image. The following gives us the first ankle-boot we saw before:
> images[0].shape
torch.Size([1, 28, 28])

> labels[0]
9
To plot a batch of images, we can use the torchvision.utils.make_grid() function to create a grid that can be plotted like so:
> grid = torchvision.utils.make_grid(images, nrow=10)

> plt.figure(figsize=(15,15))
> plt.imshow(np.transpose(grid, (1,2,0)))

> print('labels:', labels)
labels: tensor([9, 0, 0, 3, 0, 2, 7, 2, 5, 5])

Thanks to Amit Chaudhary for pointing out that the permute() PyTorch tensor method can be used in place of np.transpose(). It's like this:
> grid = torchvision.utils.make_grid(images, nrow=10)

> plt.figure(figsize=(15,15))
> plt.imshow(grid.permute(1,2,0))

> print('labels:', labels)
labels: tensor([9, 0, 0, 3, 0, 2, 7, 2, 5, 5])
Recall that we have the following table that shows the label mapping to class names below:
| Index | Label |
|---|---|
| 0 | T-shirt/top |
| 1 | Trouser |
| 2 | Pullover |
| 3 | Dress |
| 4 | Coat |
| 5 | Sandal |
| 6 | Shirt |
| 7 | Sneaker |
| 8 | Bag |
| 9 | Ankle boot |
How to Plot Images Using PyTorch DataLoader
Here is another was to plot the images using the PyTorch DataLoader. This method was inspired by Barry Mitchell. Enjoy!
how_many_to_plot = 20

train_loader = torch.utils.data.DataLoader(
    train_set, batch_size=1, shuffle=True
)

plt.figure(figsize=(50,50))
for i, batch in enumerate(train_loader, start=1):
    image, label = batch
    plt.subplot(10,10,i)
    plt.imshow(image.reshape(28,28), cmap='gray')
    plt.axis('off')
    plt.title(train_set.classes[label.item()], fontsize=28)
    if (i >= how_many_to_plot): break
plt.show()

Building the model is next
We should now have a good understanding of how to explore and interact with Datasets and DataLoaders. Both of these will prove to be important as we begin building our convolutional
neural network and our training loop. In fact, the data loader will be used directly inside our training loop.

Let's keep moving as we are ready to build our model in the next post. I'll see you there!
quiz
 DEEPLIZARD
Message
DEEPLIZARD
Message
resources
updates
Committed by on